1. Think about your brand
You are a brand. All actions you take on LinkedIn should coincide with that brand. Think about how you want to be perceived. Clever and well-liked? Innovative and adventurous? Intelligent and diligent? Obviously you should choose qualities that reflect your own personality, and then ensure that your posts keep that same tone. 2. Think about what topics you want to be an expert in You must choose your niche. People don't want to hear about everything you like unless, of course, you're Oprah. Focus on a few curated topics. I promise you will not appeal to more people if you cover a broad range of topics; instead, you'll get lost because you won't stand out. Answer the question: what am I an expert in? Stick to that. 3. Build out your profile You need a professionally-taken headshot of you looking at the camera. No selfies, no dark or grainy shots, no photos of you with sunglasses on. Write a catchy headline that sums you up in a few words (120 characters). This is your slogan for your personal brand. Fill out your summary, experience, publication, education, etc. sections. It's not just a laundry list--try to show how each experience has made you an expert. Proofread! Also, have a few friends or colleagues read it and give feedback. 4. Join targeted groups and add interests Your areas of expertise should be apparent to anyone visiting your profile; seeing what groups you are a part of and what interests you've identified helps show that. Joining groups also keeps you up to date on latest trends, and they are a good forum in which to be recognized for your expertise by peers. 5. Post consistently Post consistently. Once per day is best. A few times a week is OK. More than two posts a day is probably too much. Less than once a week is too infrequent. 6. Post quality Curate your posts - post on the topics you want to be a thought leader in. If you share articles, make your own comments on it, don’t just share them. Any photos posted should be very high-quality. It’s OK (and even good) to share some personal content -- but not too much, especially on LinkedIn. A personal post once in a while to give people “a peek” into your daily life is what you’re aiming for. 7. Write articles Thought leaders have something to say. Write longer-form articles on experiences or advice to show your professionalism. Try to post an article a week, or even biweekly. This gives you loads of credibility. 8. Engage Engage with any comments you get. Make comments on others’ posts. This helps more people to find you (and then consider you an expert). 9. Make connections Grow your network strategically. Connect with other people in the industry you're in (or want to be in). Link with people at companies you admire and want to work with. Link with agencies who work with influencers. 10. Don’t:
Let me know if you have any other tips, or if you've had any success with these!
2 Comments
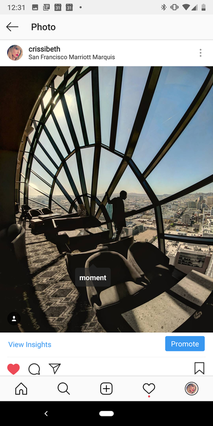 Nothing against the brand, just full disclosure I was paid $0 for this photo for Moment. I posted it because they gave me free lenses and I liked them. Nothing against the brand, just full disclosure I was paid $0 for this photo for Moment. I posted it because they gave me free lenses and I liked them. On social media, we tend to show the happy moments of our lives. And that’s normal. Our real-life photo albums don’t tend to document the hard times. They’re full of weddings and vacations and babies and smiling friends.
The public nature of social media means we are inviting other people to look at the memories we are making. Because we naturally omit the negatives, it’s easy for people to think the negatives just don’t exist. Lives look perfect. Many times, that’s not intentional. But, as an influencer, there can be a fair amount of pressure to “keep up appearances.” Why would anyone be influenced by someone whose life did not look great? Why would a brand want to work with someone who posted about difficulties with finances or personal relationship problems? Yet, it’s probably the carefully-curated galleries that feed the vitriol against influencers. There’s a prevalent perception that influencers are making hundreds--even thousands--of dollars per post, getting loads of free things, and are haughtily enjoying insta-fame. Maybe some of them are. But I know a lot of influencers, and I’d like to paint you a different picture. Influencers are mainly just artists who are being compensated for their work by patrons, who are most often brands. Most influencers don’t make enough to live on that income alone. They love the art and the social nature of the community enough that they persist. I’m not posting names, but let me give you a few snapshots into the lives of some influencers who have several hundreds of thousands of followers. -A well-known urban photographer recently became a new dad. A brand offered him $4,000 for several pictures. It wasn’t a “cool” brand and he took a lot of heat from his online community for “selling out.” But, that money helped him pay rent and buy diapers for about six weeks. I personally don’t consider anyone taking work to keep a roof over their kid’s head a sell out. -A talented female street photographer was offered an all-expenses paid international trip in exchange for pictures and video. It was an amazing experience, sure, but she can’t afford health insurance and her electric has been turned off before. She doesn’t complain; she chose this life and cheerfully does not expect to be able to “have it all.” The shade thrown her way makes me wonder if those people would trade in the security of their steady paychecks like she did. -An amazing landscape photographer is an ambassador for high-end camera bags and a tripod brand. They “pay” him in free product, and he has a full time job as a custodian to, you know, be able to buy food and stuff. Yes, people you pass in hallways in uniforms without a second thought are the same people you’re wishing you could be like as you scroll through your newsfeed. I don’t know what the right answer is here. Should we all try to be more transparent online? Would brands still pay people for content and posts if those influencers were up front about the fact that they are trying to cobble together a living by nannying, working in retail, and being an online influencer? Would people be as influenced if the influencers did not appear so successful? Maybe brands would actually pay more if influencers were open about how very little most brands are willing to pony up. What do you think? At any rate, I hope we can push for a few less eye-rolls when the term “influencer” is mentioned. What many people don’t know is that I am a lawyer in addition to being a social media addict. True story. Knowing the law has helped me out a lot in this game, and I want to share some useful tips. First off, specifically for my photographer friends, here are some FAQs about copyright ownership:
Do I need to register photos to have a copyright? No. Generally speaking, as soon as you take a picture, you own a copyright in that picture. You don’t have to register it anywhere. You can register it if you want to; this is just making a public record of the fact that you already own the copyright. Registering is a legal formality that is mainly helpful if you're real serious about suing some mofos for infringing on your work. Essentially, it boils down to: But what if I am taking photos for a wedding / a brand / the company I work for?
Great question, smarty pants. This depends on the agreement that you made with the couple / brand / company. For a wedding or family photo shoot: You will typically retain the copyright, unless you make a different agreement. You can still post the photo on your social media, on your web site, and print a copy whenever you like. It used to be that wedding togs kept a close hold on their copyrights, and charged a couple a hefty sum per re-print of a photo. Nowadays, it is more common for the photographers to grant a license to the couple or family so they can use the photos on social media and reprint them when they want to. For a brand: This is pretty dependent on the brand. For most freelance social media influencing gigs, you will retain your own copyright and will grant a very liberal license to the brand to use your photo. For freelance gigs that are more about content creation for a brand, the company may stipulate in a contract that it is “work made for hire.” This means the copyright in the photos belongs to them. It’s as though the company took the picture. You would have to be granted a license by them to use the photos on your web site, social media, portfolio, etc. In practice, most companies are not total d-bags and won’t give you a hard time for using these types of photos in an online portfolio. However, they would not be too pleased if you upload the photos to a stock image site and made money off of selling additional licenses. So don’t do that. For the company you work for: If you’re employed by a company as a photographer, chances are they own the copyright to your work-related photos. You can’t post them to any of your own channels, and the company may take issue with you keeping your work in a public portfolio. The company gets to do whatever they want with your photos. Sorry, their photos. If you’re employed by a company as an accountant, but your boss asked you to take head shots of Keith in HR for the company web site, you would own that copyright because taking photos is not really related to the job you are employed to do. If you go out shooting with friends after work or even take jobs as part of a side-hustle, those photos are separate. Any other questions on copyright ownership of your photos? HMU in comments below or at crissibeth@crissibeth.com. Clearly this information is not legal advice and does not create an attorney-client relationship. 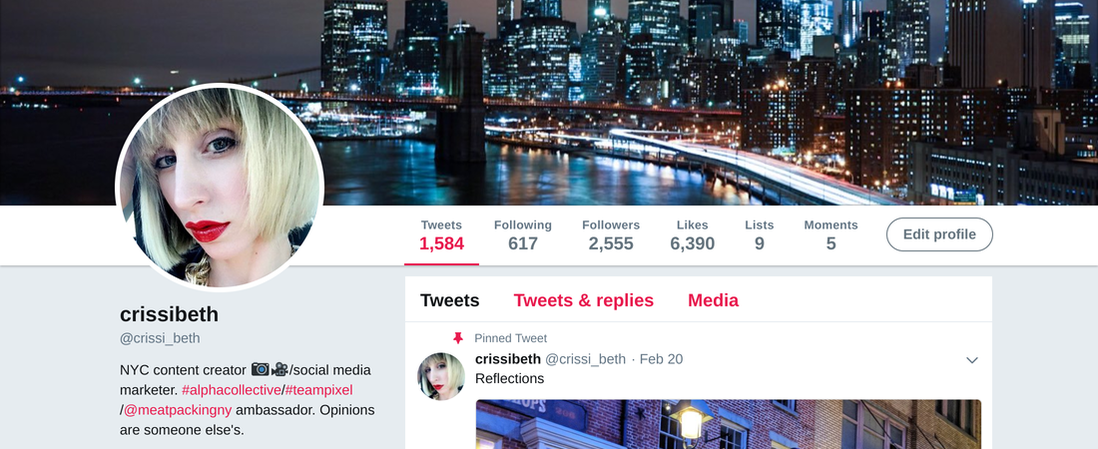 Yes, you can decide which social platforms you will grow. Once you understand the strategy, it's all a function of time and resources. This year, I decided to put more of an emphasis behind my Twitter account. Here's a fool-proof list as to how you can grow a Twitter account, as quickly as your bandwidth allows. I've used it successfully for several clients. I figured, why not do it for myself?
1. The basics. First, you need to set up a decent account. Choose an engaging avi, customize your cover, write a pithy bio. 2. Choose a niche. You can't be all over the place. Build a brand, whether you are a person or a business. Are you food-oriented? All about travel? Perhaps you excel at humorous commentary on current events. Whatever it is, you should be able to sum up your feed in a few short sentences. People want to know what to expect when they click "follow." 3. Post consistently. On Twitter, you need to be posting about 4 times a day at a minimum. Not all at once; space them out. You can schedule them in advance. 4. Post quality. No typos or misspellings. Use pictures, or better yet, video. Make sure the posts are cohesive and focus around a common theme. People choose to follow you because you serve up posts they like to look at. Posting what people like is not selling out. It's having a followers-first mentality. 5. Pin a post. Be sure to pin your top or favorite post to the top of your feed. This will give you a chance to make a good first impression and give your visitor a sense of what you're all about, rather than just showing the last thing you've posted. 6. Use hashtags. Make sure they are relevant. This increases your reach organically. 7. Follow strategically. Random follow-for-follow nonsense is worthless. Follow people with accounts similar to yours. If you are focused on providing beauty tips, follow beauty bloggers, cosmetics companies, beauty publications, etc. Twitter will be able to categorize your account and will serve up your account as a suggestion for others interested in beauty to follow. 8. Engage. After you've followed great accounts, engage with them. Reply, retweet when appropriate, like their posts. You'll get known in the right circles this way, and tweeps will help you out with retweets, showing your posts to their audience. 9. Sponsor posts. Twitter makes a lot of low-cost advertising options where you can get engagement for a few cents each. Even personal accounts can take advantage of this, and should, if they want to speed up growth. It's not cheating. Buying followers is cheating. Sponsoring your posts is putting your content in front of people outside of your current follower base to give them the chance to see it and like it. 10. Promote mode. Twitter has opened a beta program to the public that gently promotes your tweets in people's feeds. It's $99 a month (only tier available at the moment), and the nice thing about this is that it is truly set it and forget it. You get the benefits of automation without any of the fear of breaking a Twitter policy. More on this later.
2. Write a short, clear bio.
Things to include:
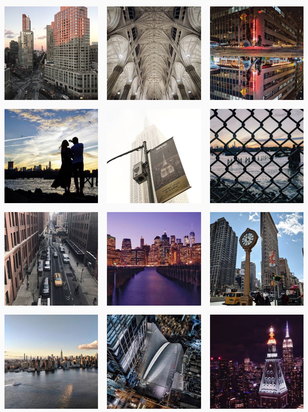
3. Keep your gallery focused and your quality high. I'm sure your kids / puppy / new shoes are adorable, but if the photo is not in line with the work you are aiming for, don't post it. Everyone I know has a separate "personal" account where they post blurry club shots, their cooking exploits, and selfies for family and friends. With that, your gallery should be curated to be somewhat niche. Someone should be able to get a feel for the kind of photos you take by looking at your gallery. Of course, most photographers are comfortable with a variety of subjects. But I'm telling you: the focused gallery is going to get the job. A restaurant group is going to be looking for someone who takes great food shots and flat lays; an apparel brand is going to be looking for portraiture with a look and feel that matches their brand -- you get the idea. 4. Sign up with any agency you can. There are load of agencies out there who are looking for influencers -- just Google it. Sadly, a lot of them are still pretty outdated in their thinking. They look for a large following without much regard to quality of engagement. So this method works the best if you already have about 10K or more followers. Still, it's worth signing up for as many as you can. Maybe for every 10 agencies I make a connection with, I'll get one job. 5. Network! Some people call it being thirsty, I call it hustling. A lot of my work comes from interpersonal relationships and word of mouth recommendations. Need more info on exactly how to network? Check out this blog, or this one. The other day I went to a photography exhibit. There were beautiful 11x14 prints, matted and framed. As I was admiring the subject matter, expert composition, technical skill, and creative editing, I heard a man scoff at the price. “Two hundred dollars for a photo!” That price seemed eminently reasonable to me, but it seemed like a very high price to him. It made me want to walk through the “cost” of a photo you see hanging in an exhibit. Many people don’t understand the time and money that goes into taking one good photo. Some of the costs should be treated like overhead -- no one would expect a single buyer of a single print to bear them -- but they are worth factoring into the overall cost of a photo. Let’s take this photo for example and walk through some considerations. 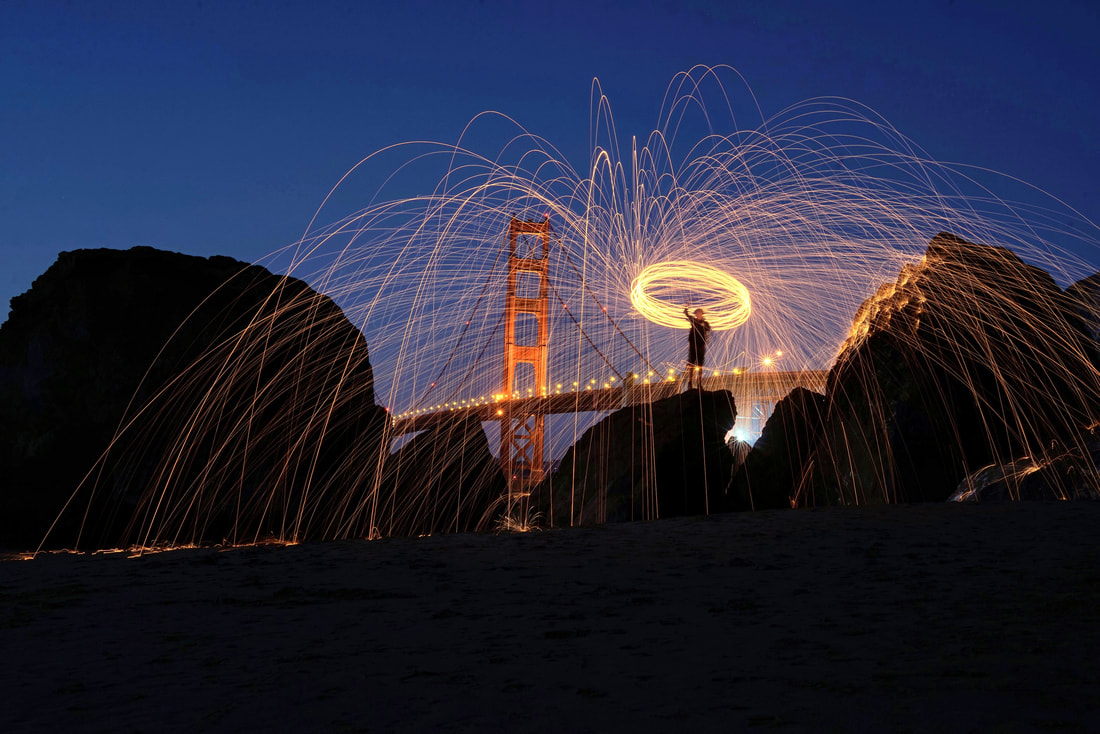 Equipment
First off, there’s the gear. To take a long-exposure night shot like this one, you need a good DSLR. You can get a decent camera body for a few grand. Add another grand for one lens, give or take. (Most photographers I know have more than one, but anyway.) You need the camera to be steady while leaving it open for a long exposure, so you need a good tripod, which will run you a few hundred bucks. If you want to use your camera’s bulb mode, you probably want to get a cable release as well. You can get a decent cheap one for less than $20. You should have an extra battery because long exposures suck up power ($30). To carry everything, you need a padded camera bag, plus a tripod bag ($100). This was especially important for this location in particular, as we ended up needing our hands free for climbing. Supplies This picture required some extra supplies. For spinning steel wool, you need to buy very fine plumber’s grade steel wool. Usually this means a trip to a hardware store or special ordering it online. So there’s the time and effort cost of obtaining that, either finding and making a trip to the store or planning a few days in advance so you can get it shipped to you. You also need a strong metal whisk, a nine volt battery, and a fire-resistant cable. These need to be wrapped separately, or they *will* catch on fire, and in plastic, or else they will get wet and not work . For these props, add another $50. If you want to be careful, you should also have a hoodie, gloves, and clothes you don’t mind getting a little singed in case any embers go awry. (One time I skipped the long sleeves and now I have a scar on my upper right arm, but that's a story for another day.) Planning There’s time and effort involved in researching and scouting locations. There’s a few ways of doing this. You can spend hours on the Internet, looking at pics from Instagram, Google, Flickr, etc. and then trying to find the exact location on a map as well as how to access it. You can also ask someone who knows, but in order to do that you probably have to be well networked, which is hard to quantify, but it is very valuable. For steel wool, you have to make sure the spot will not only be visually stunning, but will also be safe. This means there can’t be any dry brush around that could catch flame, no members of the general public roaming around, and remote enough so as not to attract unwanted attention of authorities. I don’t know the exact rules around spinning flaming steel wool, but I *do* know from experience that authorities don’t like it. You have to figure out when and where will make a great shot. You have to think about factors like weather and tides and sunset angle. You have to put together and pack your gear. Steel wool works best with at least two people (one to spin, one to man the camera), so you have to know someone crazy enough to participate in your antics, and coordinate with someone else’s schedule. It’s all time, and time is worth something. Travel Then there’s getting there. I don’t live in San Francisco, so there were travel costs like an airplane ticket, hotel room, rental car, gas, transport back and forth to the airports, etc. It’s also a lot of time. Getting to this place required a drive and a hike. We parked the car around 5 pm and started hiking on a rocky beach. Then the beach turned into craggy boulders, so we picked our way over those. As the tide came in, we had to get wet a few times, so we held our gear high and went as fast as possible. Right after sunset, we set up the shot. Someone had to climb a large boulder and was handed up the supplies. Afterwards, we had to make the long trek back in almost complete darkness. We held flashlights while climbing barnacle-covered boulders in the dark, avoiding the ocean water as much as we could, and trudging through sand laden with packs. The parking lot had been gated shut by the time we got back to the car, so one guy needed to push open a gate and hold it while we drove the car through. Technical Skill Knowing how to take a long exposure shot takes some technical skill. This isn’t a shot that can be taken with a camera’s auto setting. You have to know which f stop, how many seconds, which ISO, etc. There’s a lot of time either educating oneself or practicing to achieve this. After taking the shot, you will edit it. This means you need a PC (or at least a good phone or tablet). You’ll need software. Most photographers I know have Lightroom, meaning they pay a monthly subscription fee of $30. It takes time to edit. Sales Costs There’s a cost associated with printing the photo, and with framing it. There’s time in composing the show. There’s time in coordinating with a gallery, signing contracts, talking about timelines, and delivering an artist bio. Of course, there is also delivering the work: gas, tolls, parking, time. Also, the gallery takes a commission -- usually between 30 and 50%. You will also pay taxes on any income gained from the sale. General People Costs Also just a reminder that photographers are people, too, and in addition to all of these costs associated with a photo, they have normal human costs. They need to keep a roof over their heads. They need to pay the electric company, cell phone carrier, internet company, for health insurance, for heat and water. They eat practically daily. They may have a car payment, student loans, or friends who expect wedding gifts, or kids who need diapers or braces. Does $200 still seem like a lot? Share to spread awareness. I’ve attended more events than I can count as an influencer. It’s something I really love to do! Influencer marketing is huge right now, and it’s still on the upswing. One way to get a lot of marketing around an event you are throwing is to invite influencers. There’s key ways to
To my fellow influencers: have I missed anything? Read my tips on how to get invited to a swanky influencer event here. Check it out: Here are some videos I’ve created of events I’ve attended over the last year or two. First of all, why should I do this? For me, it was about two things:
Wait a tick, how much will the taxes be?
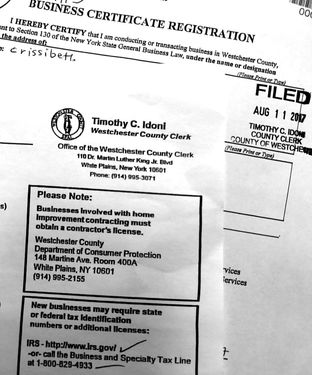
It depends, but a good rule of thumb is to set aside ⅓ of the income you make for taxes. That’s stupid high. But OK, back to what you were saying. So how do I register the name of my business? Five easy steps. I was in and out in less than 15 minutes. Didn’t even get a ticket for parking illegally. Wait what?
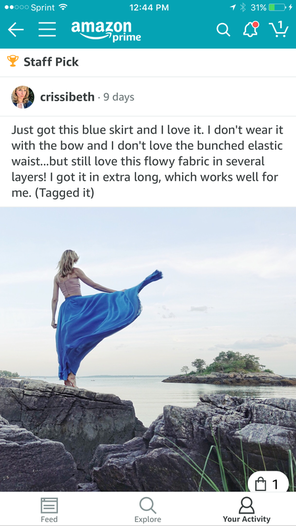
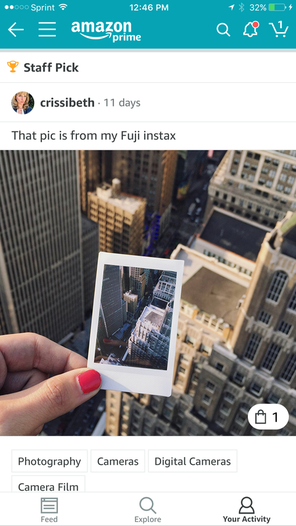
Congratulations! You’re officially registered! Why not celebrate? Celebrating is fun! Next thing I did was get an EIN (Employer Identification Number) from the IRS. Note: You do not need to have a DBA to get an EIN if you are just using your legal name and not a business name. Now why would I want to get an EIN? Again, for me, this was about the money / taxes. I wanted a business bank account to keep things separate, and the banks require an EIN. You can apply for one and get one immediately online here: Yay Instant Gratification! The IRS wants to make it as easy as possible for you to pay them money, so it’s really not a difficult process. I had mine within 10 minutes. When they ask you the questions with radio buttons, click “no” for all of them. They generate you an EIN and give you a PDF (I emailed it to myself). Then you take that into the bank with your DBA paperwork and they will get you set up with a business account. So how do I open a business account at the bank? I went to Bank of America because I already have a personal account there. I’m not specifically recommending them, but I’ll say this for them: they aren’t awful. I’m sure whatever bank you use has comparable options. I was able to open a business account with no monthly fee if I spent $250 on the account’s debit card or kept a minimum balance of $3,000. I had more than that to put in, and I figured I would try to pay for business expenses out of my business account with the debit card, so this worked out fine for me. Do I hafta do all this though? No, you probably don’t. If you work for yourself as a freelancer, and the companies make out checks to your legal name / wire money to your personal bank account, and you don’t have any employees, then you don’t have to register a DBA and you don’t have to get a business account. The IRS is just as pleased to take money from your personal accounts and you can use your personal social security number instead of an EIN. Just know if the company you are working for reports the money they paid you, you will have to pay taxes on it regardless of whether you are considered a business or not. At least if you’re set up as a business, you can deduct expenses from the crazy exorbitant taxes freelancers have to pay. If you have any questions at all, just let me know! I will try to answer based on my experience. Last week I mentioned Amazon Spark in the PR Week podcast I was on. I've since had a chance to become entrenched enough in the community to feel qualified to complain about it a bit. I mean, to offer constructive suggestions. What is Amazon Spark? Amazon Spark is the newest “social media” platform. It looks like Instagram and Pinterest had a baby. Users share pretty photos with descriptions. Other users look at the photos and “smile” or comment on them. Some Differentiating Features Tagged Products This is the most obvious difference between Amazon Spark and other social platforms. Amazon is selling to you, and they are not bashful about it in the least. This social media platform is for shoppers, by shoppers. And so they make it easy to buy. Instagram is notoriously unfriendly for hyperlinks, and while Pinterest allows linking out, Amazon makes the process of clicking through downright seamless. Users can tag specific products (sold on Amazon, of course) within Spark photos they upload. When someone clicks on the tag, a small product photo, description, and rating appears and one more tap brings you to the page to purchase the item. No one is wondering how Amazon is making revenue via this app. Influencers With that, Amazon Spark is already heavy with #sponsored posts. I recognize a lot of the Sparklers(?) as heavy-hitters on Instagram. These are people with a proven track record in producing quality content, professionally. Amazon is doing something Instagram is not, though: while Instagram is shadow-banning, Amazon is throwing their support behind paid influencers. Sparklers are not eating away at ad revenue; they are actively encouraging sales via Amazon. One of the influencers I reached out to very kindly told me he was not able to speak to press about his relationship with Amazon due to a contract he had signed, so naturally I was like, “Omigod you called me press that’s awesome.” I definitely intend to do some more digging around this though, so stay tuned. The Feed Algorithm Everyone is always talking about social media algorithms, namely why certain photos show up in your feed and others do not. Amazon Spark serves up a feed that seems to have less to do with whom you follow, and more to do with discovery. Users choose “interests” to follow, and Amazon delivers photos within those interest categories. Right now, there doesn’t seem to be a an emphasis on number of followers at all - stats revolve around how many smiles and comments a user garners. Staff Picks A Staff Pick is a pic the staff loves. They award a little gold trophy emoji, and presumably this boosts the picture’s reach. Going through recent Staff Picks photos shows that Amazon is looking for quality photography. Mirror-selfies of the shirt you just got out of the Amazon box will not cut it. They choose “bangers”--technically well-executed photos with subject matter that has broad appeal.
My Top 5 Early Suggestions
Have you tried Amazon Spark yet? What are your thoughts?
I got to be on PR Week’s podcast last week! It was such a cool experience!
I’ll tell you how that came about. I met Steve, the Editor-in-Chief of PR Week, at a Cision seminar I attended last month. Cision is a PR and social software company (and I manage the social media for a PR company, so that’s why I was there). Steve was one of the panelists who spoke, and I really liked some of his observations and expert insights. I spotted him by the bar after Cision’s presentation and boldly decided to introduce myself and tell him how great I thought he was on the panel. Steve was gracious and kind to me, and we had a very animated conversation about social media and influencer marketing. It’s a subject I know a lot about on account I am addicted to it, and I get pretty passionate. After a good half-hour of talking, Steve invited me to be on his podcast. This was never my goal when I began speaking to him, but naturally I squealed with delight and accepted immediately. If you haven't seen it already, please enjoy it here (the other gent is "Franktastic" Frank):
So here are my take-aways if you want to get invited onto podcasts or the like:
|
@crissibethBlogging my path as a professional photojournalist / social media addict / influencer Archives
June 2023
Categories |
||||||||||||


 RSS Feed